With all of the information on the health benefits of probiotics, you may be wondering how best to get them into your system.
Did you know that it’s possible to make your own at home?
We’re here to give you the scoop on how to do it. We’ve got some background and “how to’s” to make it easier. You won’t need many things to get started either. In fact, there are only three ingredients necessary in vegetable ferments: vegetables, good salt, and water.
Fermenting foods is a traditional way of preparing them which both enhances their nutritional value and preserves the foods for longer safe storage. The results were healthy and yummy fermented foods that were usually eaten daily!
Lacto-fermentation. The name comes from the good bacteria, Lactobacillus, which are present in the environment and on the surface of most plants. The process involves getting these natural probiotics to multiply in foods, including vegetables like cabbage to make sauerkraut and kimchee, as well as cucumbers to make naturally fermented pickles.
Lactobacillus converts sugars into lactic acid which is a natural preservative for the foods that also inhibits bad bacteria from taking over in the body. The process of fermenting and using salty brine allows the good guys to grow and starves off bad bacteria.
Benefits of Fermenting Vegetables
- Supports the immune system
- Aids in digestion
- Produces digestive enzymes
- Produces B vitamins (folic acid, riboflavin, niacin, thiamin, and biotin)
- Fights off the bad bacteria in your body and helps with intestinal issues like diarrhea
- Breaks down anti-nutritional substances: mycotoxins and phytic acid
Getting Started
Ingredients
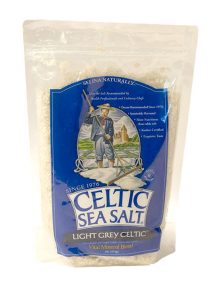
1) Salt is an important part of fermentation. Salt mixed with water creates the brine needed to ferment the vegetables. Salt prevents bad bacteria from forming and also keeps the vegetables crisp while preserving vitamin content. Adding too much salt can kill all the bacteria, Lactobacillus included, so stick with the suggested amount.
Celtic Sea Salt is the best choice in our opinion because it is unrefined and known for its richness of taste and excellent trace mineral content. Regular table salt is not the right choice because it contains additives like anti-caking agents and iodine that can make the ferment go bad. In addition, table salt is totally refined, has been processed with chemicals and has had all its trace mineral content removed (they sell the trace minerals for more money!).
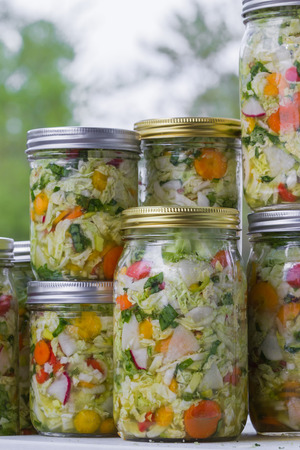
2) Vegetables undergo Lacto-fermentation, preserving them and enhancing the nutrients for absorption. The bacteria cultivated also aid in digestion by producing vitamins and enzymes. Pick your preferred veggies and don’t be afraid to spice it up with your own herbs.
3) Water can be spring water or filtered water. You want to use water with mineral content, definitely not tap water that contains microorganism-killing chlorine and fluoride.
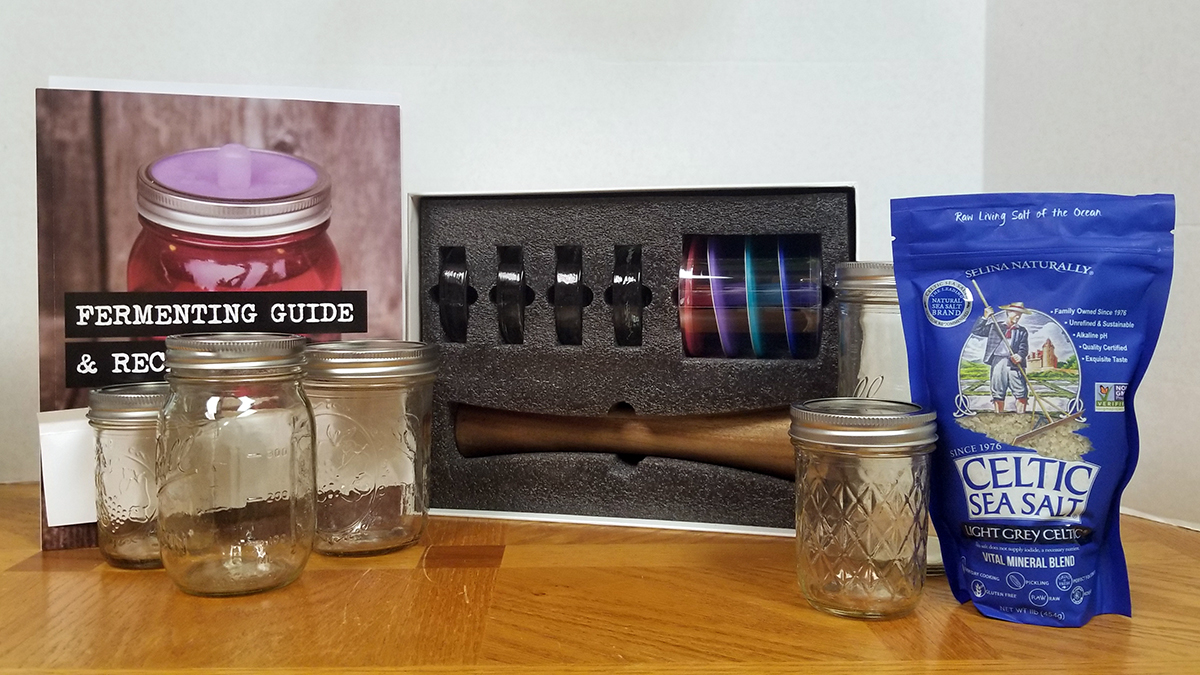
Fermentation Supplies
1) Wide Mouth Mason Jars or a Ceramic Crock
Don’t use metal pots or bowls because some metals can react with salt or produce acids during fermentation. Also avoid using plastic containers, as they contain toxic chemicals that will leach into anything put in them. Fermented foods produce acids, and these will further break down the plastic.
Also avoid using plastic containers, as they contain toxic chemicals that will leach into anything put in them. Fermented foods produce acids, and these will further break down the plastic.
2) Lid for the Mason Jar
You can either cover it with a towel or use a special unreactive silicone top with a vent to cover the jar opening that screws on with the Mason top metal rim.
If you don’t use a vented plug but have the regular Mason jar lid, you’ll need to unscrew it throughout the fermenting process to ventilate it.
3) Weight
You’ll need a weight such as a heavy plate, a round glass weight made for this purpose, or a water-filled container that fits inside the jar or crock to keep the vegetables submerged under the brine.
4) Masher or Mallet
This is used for compressing the vegetables in the Mason jar or crock and pushing them under the brine, often made of wood.
5) Knife or Food Processor for grating, chopping, or slicing the vegetables.
Preparing for Fermentation
It’s up to you how you’d like to prepare the vegetables.
You can prepare them the following ways:
- Chopping – Chopping vegetables to the desired size. Larger chunks take longer to culture.
- Grating – You can use this method for the hard or crunchy veggies making it easier for the salt to penetrate. This will come out more like a relish.
- Slicing – Slice softer vegetables into thicker pieces to keep their shape. Slice harder ones into thinner pieces.
- Leaving Whole – This is an option for the smaller veggies.
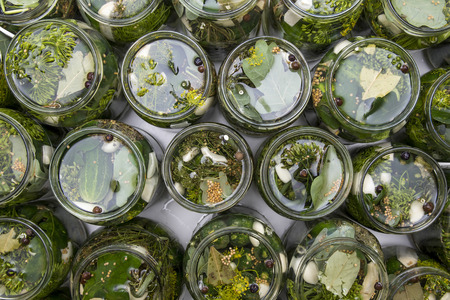 Making the Brine
Brine is simply your water and salt combined.
Dissolve the salt in water to make the brine. The suggested amount of salt is 1-3 tablespoons per quart of water. This can vary somewhat by a recipe. Remember you want enough brine to cover the vegetables. The size of the Mason jar or crock will help you determine how much water/salt to use.
You can also use a brine calculator on the internet if you desire more precise, vegetable-specific calculations.
Putting It All Together
- Cut or slice your vegetables of choice.
- Mix the water and salt until the salt is dissolved. Put your vegetables in the Mason jar or crock. Pour the brine over.
- Push down the vegetables with your masher so that they are submerged completely below the brine.
- Place your weight on top of the vegetables to keep them under the brine throughout fermentation.
- Screw the lid onto the Mason jar or cover it to keep air out as much as possible while allowing fermentation gases to escape. If you use a crock, make sure to cover it so that debris or critters don’t find their way into it.
- Store the container somewhere at room temperature.
- This only applies if you are using the traditional screw on lid of the Mason jar. Every day, open the lid to let the carbon dioxide escape. Carbon dioxide is naturally produced by fermentation. The buildup of carbon dioxide can cause the container to become highly pressurized.
- Continually check to make sure the veggies stay under the brine and push them down if they are not.
How Do You Know If The Fermentation Process Is Working?
Lactic acid fermentation produces gases which are visible as bubbles. You should start to see those after the first few days.
The second way to find out is by opening the container after a few days. If a sour smell like vinegar is present, that’s a good sign. If the aroma smells rancid – something has gone wrong and needs to be discarded. You should have a properly fermented culture in about a week.
Remember that fermentation is a process and longer fermentation will alter the flavors. After the first several days, you could start tasting it on a daily basis. When you achieve your desired taste, then it’s okay to refrigerate. However, refrigeration is not recommended from the start because it will slow and inhibit the good bacteria growth.
Experiment with different vegetables and flavors, and have fun fermenting!
Basic Kimchi Recipe
Timeframe: 1 week or longer
Ingredients:
1 pound/500 grams Chinese cabbage (Napa or bok choy)
1 Daikon Radish or a few red radishes
1-2 carrots
1-2 onions and/or leeks and/or a few scallions and/or shallots (or more)
3-4 garlic cloves (more or less for the desired flavor)
3-4 hot chilies or a hot pepper of your choice (optional)
3 Tablespoons/45 milliliters (or more) fresh grated ginger root
Directions:
- Mix a brine of about 4 cups (1 liter) of water and 4 tbsp salt (60 milliliters). Stir until the salt is dissolved.
- Coarsely chop the cabbage, slice the carrots and let the vegetables soak in the brine covered by a weight until they are soft. This may take a few hours or can be done overnight.
- Prepare spices by grating the ginger, chopping the garlic and onion. Remove the seeds from the chilies and chop, crush, or add them whole.
- Once the veggies are soft, drain the brine off into a bowl and put it to the side. Taste the vegetables and if they’re too salty, rinse them. If they’re not salty enough you can sprinkle them with a couple teaspoons of salt and mix.
- Mix the vegetables with the spice paste. Once it’s all mixed thoroughly put them into a clean quart size (liter) jar. Press it down until the brine rises. If there’s not enough to cover, add some of the reserved brine used to soak the vegetables. Weigh the vegetables down with the chosen weight.
- Ferment in the kitchen or another warm place. Keep it covered so mold or debris can’t get into it. Remember to loosen the cover once daily to let the gases out, if you don’t have a cover with its own vent. You can taste it daily to get it desired flavor. After about a week it can be moved to the refrigerator.
Best Salt to Use: Celtic Sea Salt
We just started carrying this fermentation kit. It’s not in our shopping cart yet, but if you’re local, you can stop by at our store at 611 S. Myrtle Ave Suite D, Clearwater, Florida, 33756 and purchase it here.